Pro Tips for a Seamless Move: Cleaning Your Home at its Best
Posted on 31/05/2025
Pro Tips for a Seamless Move: Cleaning Your Home at its Best
Moving to a new home is often an exciting yet challenging process. One of the most overlooked but critical aspects of a successful relocation is ensuring your old home is spotless before you hand over the keys. Whether you're moving out of a rental, selling your property, or just want to leave a great impression, a thorough move-out cleaning can make all the difference.
This comprehensive guide will walk you through pro tips for achieving a seamless move by cleaning your home at its best. We'll cover everything from creating an effective cleaning plan to using the right supplies and tackling stubborn spots. If you've been searching for the best move-out cleaning tips or looking to ensure your home is at its peak cleanliness, this article is packed with practical advice to make your move smooth and stress-free.
Why Move-Out Cleaning Matters
Ensuring your property is clean before you move out isn't just about courtesy--it's often a requirement. For renters, leaving the house or apartment in pristine condition helps in reclaiming your security deposit. Homeowners can benefit from a professional-level clean through better property value and faster sales.
- A spotless home leaves a lasting impression on buyers or landlords
- Reduces stress during the moving process
- Increases the chances of getting your full deposit back
- Can uncover potential issues needing attention before you move
Step 1: Plan Your Cleaning Process
Create a Cleaning Checklist
Before you grab your cleaning supplies, take some time to walk through your home and create a detailed cleaning checklist. This will help ensure you don't miss any spots and can efficiently tackle one area at a time.
- Divide tasks by room: kitchens, bathrooms, bedrooms, living areas, and miscellaneous spaces
- Note any particularly dirty areas needing extra attention
- If time is tight, prioritize spaces that are most visible or that accrue the most grime (such as kitchens and bathrooms)
Gather the Right Supplies for Deep Cleaning
Using the right cleaning supplies will not only save you time but ensure the best results. Before you begin, assemble these essentials:
- All-purpose cleaner
- Glass cleaner
- Disinfectant sprays and wipes
- Magic erasers or sponges
- Floor cleaner suitable for your specific flooring
- Microfiber cloths and paper towels
- Broom, dustpan, mop, and vacuum
Step 2: Clean Room-by-Room for Best Results
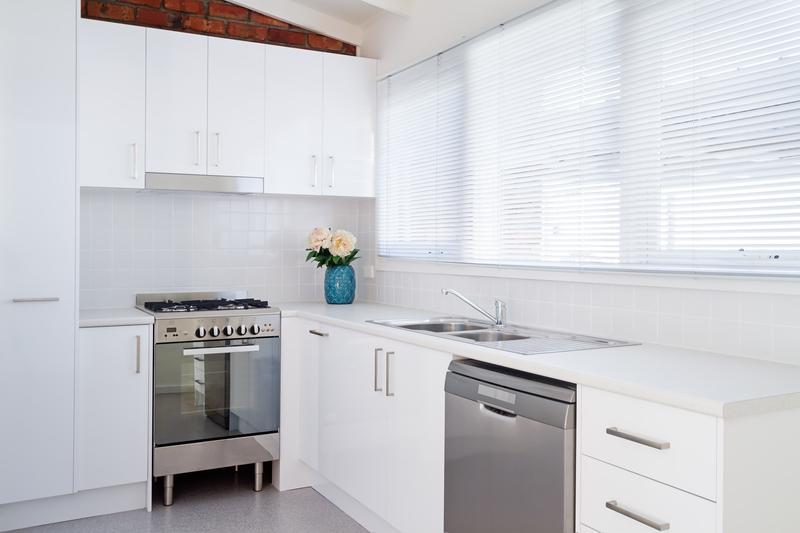
Kitchen Cleaning Tips for a Seamless Move
The kitchen is one of the most used--and often the dirtiest--spaces in any home. For a truly impressive move-out clean, pay special attention to:
- Appliances: Clean both inside and out. Remove food spills, grease buildup, and stains from ovens, microwaves, and refrigerators. Defrost and wipe down the freezer. Don't forget the dishwasher!
- Cabinets and Drawers: Empty, wipe, and sanitize all storage areas. Use a gentle cleaner to remove stains and sticky residue.
- Sinks and Faucets: Remove limescale and polish fixtures for a sparkling finish.
- Counters and Backsplashes: Clean all surfaces thoroughly, paying special attention to stains and grout lines.
- Floors: Vacuum and mop, focusing on under appliances and in corners.
Bathroom Move-Out Cleaning Techniques
Bathrooms require meticulous attention to detail. Follow these pro tips to ensure your bathroom looks as good as new:
- Showers, Tubs, and Tiles: Use a descaling bathroom cleaner to remove soap scum, mold, and mildew. Scrub grout lines for a polished look.
- Sinks and Countertops: Disinfect all surfaces. Pay attention to drains and fixtures, removing limescale and water spots.
- Toilets: Clean inside and out with a disinfecting cleaner. Don't forget hard-to-reach areas behind the toilet base.
- Mirrors and Glass: Use a streak-free glass cleaner for ultimate shine.
- Cabinets: Empty, wipe, and sanitize all shelves and drawers.
- Floors: Sweep, mop, and ensure corners and edges are spotless.
Living Room and Bedroom Move-Out Tips
These high-traffic spaces can collect dust, debris, and stains over time. Here's how to clean your living room and bedrooms for moving out:
- Dust and Wipe All Surfaces: Start high (ceiling fans, light fixtures) and move down. Clean shelves, baseboards, and window sills.
- Vacuum Carpets and Rugs: Spot-treat any stains and consider using a carpet cleaner for deep cleaning.
- Clean Windows and Mirrors: Spray and wipe for a streak-free finish.
- Closets: Remove all belongings, then vacuum and wipe down walls and shelves.
- Doors and Handles: Wipe down handles, skirting boards, and frames to remove prints and smudges.
Step 3: Don't Forget These Often-Missed Areas
Even with a detailed checklist, certain areas are easy to overlook during your move-out cleaning. Ensure a truly seamless transition by focusing on:
- Air Vents: Dust and wipe to remove accumulated debris
- Light Switches and Outlets: Use disinfectant wipes
- Baseboards and Trim: Dust and wipe to eliminate dirt buildup
- Inside Closets and Storage Spaces: Wipe down shelving and remove cobwebs
- Behind and Under Appliances: Clean under the stove, fridge, and washing machine
- Blinds and Window Tracks: Dust blinds and clear out tracks of dirt and bugs
Step 4: Advanced Cleaning Tactics for a Spotless Home
Dealing with Stains and Odors
Stubborn stains and lingering odors can sabotage even the most thorough cleaning job. Here's how to tackle them for a truly seamless move-out cleaning:
- Stains: Identify the stain type (e.g., food, ink, pet). Use targeted stain removers and follow instructions carefully.
- Odors: Ventilate rooms thoroughly. Use baking soda on carpets and fabrics to absorb smells, and consider an ozone or air purifier for strong odors.
- Mold and Mildew: Scrub affected areas with mold-specific cleaners and address underlying moisture issues to prevent recurrence.
Final Touches That Make a Difference
The little details matter when you want to leave a home at its best. After your deep clean, perform these final move-out cleaning touches:
- Walk through the house with a bright light to spot missed dirt or streaks
- Replace any burnt-out light bulbs
- Leave instruction manuals or appliance warranties nicely organized for the new occupants
- If leaving items behind (like curtains), ensure they're freshly washed
- Dispose of all trash and recycling properly
Step 5: When to Hire Professional Move-Out Cleaners
While DIY cleaning can save money, sometimes hiring professional cleaners is the best route, especially for:
- Large homes or apartments where cleaning would take days
- Properties requiring a deep clean due to pets, smoking, or neglect
- Time constraints when juggling work, family, and moving logistics
- Landlords or sellers needing guaranteed standards for new tenants or buyers
Top tip: If you hire professionals, book your cleaning as late as possible in the moving process so your home stays pristine until your move-out date.
Bonus: Eco-Friendly Move-Out Cleaning Tips
Greening your move-out cleaning is good for the environment and future residents. Here's how to clean sustainably:
- Choose biodegradable or non-toxic cleaning products
- Use reusable microfiber cloths instead of disposable wipes
- Open windows for ventilation instead of spraying chemical air fresheners
- Recycle responsibly--sort and properly dispose of cleaning product containers
- Minimize water waste: use buckets instead of running water for mopping
Frequently Asked Questions about Move-Out Cleaning
How long does it take to clean an entire house before moving?
The time required depends on the home's size and condition. On average, expect 4-8 hours for a one-bedroom apartment and up to 2 days for a large house. Having a plan and working room by room streamlines the process.
What should I prioritize if I'm short on time?
Focus on high-traffic and high-visibility areas, especially kitchens, bathrooms, and entryways. Clear out the fridge, sanitize counters, scrub toilets and sinks, and ensure floors are debris-free.
Should I paint or repair before cleaning?
Make necessary repairs before your final clean to avoid undoing your cleaning efforts. Painting can cause dust and drops--tackle it first, then finish with a comprehensive clean.
Do landlords have to provide professional cleaning after I leave?
Local regulations vary. Usually, tenants must return the property in a clean condition. If a landlord requires a professional service to meet specific standards, this should be stated in the lease.
What if I miss something and the new residents complain?
Document your cleaning (photos or a checklist). Good communication with property managers or buyers can often clear up honest oversights.
Conclusion: Make Your Move a Success with Seamless Cleaning
A seamless move is not just about packing boxes--it's about leaving your old home in immaculate condition. With these move-out cleaning tips, you're equipped to handle every step, from detailed checklists to the best techniques for every room. Remember, thorough cleaning benefits everyone involved and sets the stage for a stress-free transition to your new beginning.
Take pride in your move by ensuring both a smooth departure and a welcoming space for the next occupant. With preparation, the right supplies, and a strategic approach, your move-out cleaning can truly be seamless and professional.
- Plan ahead with a comprehensive checklist
- Use quality supplies for effective results
- Pay attention to details--even those hidden nooks
- Consider professional help when necessary
- Be environmentally conscious with your cleaning choices
Start your move on the right foot--make move-out cleaning a priority, and you'll enjoy peace of mind and a seamless move to your next adventure!
Latest Posts
The High Risks of Moving Your Own Piano and Better Options
Your Go-To Checklist for Moving Your Bed and Mattress
Crucial Packing Insights for a Successful House Move
Pro Tips for a Seamless Move: Cleaning Your Home at its Best


